Kamran Agayev's Oracle Blog

Oracle Certified Master

Archive for the 'Administration' Category

Solution for ORA-27154: post/wait create failed ; ORA-27302: failure occurred at: sskgpbitsper

Posted by Kamran Agayev A. on 21st June 2019

Today, while creating an empty database in Exadata machine where there was enough free space and memory, we got the following error:

SYS@TEST> startup nomount
ORA-27154: post/wait create failed
ORA-27300: OS system dependent operation:semget failed with status: 28
ORA-27301: OS failure message: No space left on device
ORA-27302: failure occurred at: sskgpbitsper


The problem wasn’t related with the space at all, even from the error message we see “No space left on device”.

From the error output, I realized “OS system dependent operation:semget“, where “sem” means “semaphore“. Having enough free memory and space, the process couldn’t allocate necessary semaphore, either because of the kernel parameter wasn’t configured correctly, or all memory is occupied. To get information about semaphores and shared memory, I ran ipcs command:

[oracle@node2~]$ ipcs
------ Shared Memory Segments --------
key shmid owner perms bytes nattch status 
0x00000000 0 root 644 64 2 dest 
0x00000000 32769 root 644 16384 2 dest 
0x00000000 65538 root 644 280 2 dest 
0x00000000 98307 root 644 80 2 
0x00000000 131076 root 644 16384 2 
0x00000000 163845 root 644 280 2 
0x00000000 262602758 oracle 640 4096 0
------ Semaphore Arrays --------
key semid owner perms nsems 
0x61000625 98306 root 666 1 
0x00000000 163844 root 666 3 
0x00000000 1769477 root 666 3 
0x00000000 4096006 root 666 3 
0xd9942a14 3604487 oracle 600 514 
0xd9942a15 3637256 oracle 600 514 
0xd9942a16 3670025 oracle 600 514 
0x192b36e8 219578379 oracle 640 1004 
0x5f94bc50 6062092 oracle 640 1004 
0x00000000 286752781 root 666 3 
0xaa3762f4 6324238 oracle 640 154


The list was long, so I decided to count the rows

[oracle@node2 ~]$ ipcs -s | wc -l
256


So overall I have 256 semaphores allocated. Then I checked /etc/sysctl.conf file for the KERNEL.SEM parameter:

[oracle@node2 ~]$ more /etc/sysctl.conf | grep sem
kernel.sem = 1024 60000 1024 256
[oracle@node2 ~]$

You can get more detailed output from ipcs -ls command as follows:


[oracle@node2 ~]$ ipcs -ls
------ Semaphore Limits --------
max number of arrays = 256
max semaphores per array = 1024
max semaphores system wide = 60000
max ops per semop call = 1024
semaphore max value = 32767


The last column indicates the maximum number of semaphore sets for the entire OS. In this case you have to options to solve the problem:

  • Increase the max number of arrays parameter in the /etc/sysctl.conf file
  • Remove unnecessary semaphores


Increasing max number of arrays parameter is the easiest (and the fastest) way. Here how it works:


1. Get the value for the SEM parameter:

[root@node2 ~]# cat /etc/sysctl.conf | grep sem
kernel.sem = 1024 60000 1024 256
[root@node2 ~]#

2. Edit it and change it to 260 (more than the value you get from ” ipcs -s | wc -l” command) and run the following command to set the parameter to be persistent

/sbin/sysctl -p

3. Create a dummy parameter file and start the instance in NOMOUNT mode to see if the oracle user can get a semaphore from the memory:

[oracle@node2 dbs] mode initTEST.ora
db_name=TEST
sga_size=2g


[oracle@node2 ~] export ORACLE_SID=TEST
[oracle@node2 ~] sqlplus / as sysdba
SYS@TEST> startup nomount
ORACLE instance started.
Total System Global Area 2137886720 bytes
Fixed Size 2254952 bytes
Variable Size 956303256 bytes
Database Buffers 1090519040 bytes
Redo Buffers 88809472 bytes
SYS@TEST>


It worked!


The second option to solve the problem, is to find out the ‘aged’ semaphores from the memory and remove them. Each semaphore is linked to the PID in the OS. In the following example I have overall 256 semaphores where 23 of them are related with oracle user (db instances etc.) and 229 of them related with root user. Most processes that hold the semaphore in the memory died long time ago, but semaphores didn’t age out. To find and kill the PID of the semaphore, we run ipcs command with -i parameter. First let’s get list of semaphores under oracle user and check one of them as follows:

[root@node2 ~]# ipcs -s | grep oracle 
0xcfe88130 3473414 oracle 600 514 
0xcfe88131 3506183 oracle 600 514 
0xcfe88132 3538952 oracle 600 514 
0xf0720010 411041803 oracle 640 802 
0xf8121f34 145653772 oracle 640 1004 
0xf0720011 411074573 oracle 640 802 
0xf0720012 411107342 oracle 640 802 
0xc5d91710 196444189 oracle 640 504 
0x86d48ae8 44236836 oracle 640 304 
0x67556608 199786542 oracle 640 876 
0x67556609 199819311 oracle 640 876 
0x6755660a 199852080 oracle 640 876 
0x6755660b 199884849 oracle 640 876 
0x6755660c 199917618 oracle 640 876 
0x806b87cc 157450352 oracle 640 752 
0x806b87cd 157483121 oracle 640 752 
0x806b87ce 157515892 oracle 640 752 
[root@node2 ~]#


Next, we run ipcs command with -i parameter to get the list of PIDs as follows:

[root@node2 ~]# ipcs -s -i 157450352 | more

Semaphore Array semid=157450352
uid=1001 gid=1002 cuid=1001 cgid=1002
mode=0640, access_perms=0640
nsems = 752
otime = Fri Jun 21 18:51:23 2019 
ctime = Fri Jun 21 18:51:23 2019 
semnum value ncount zcount pid 
0 1 0 0 315611 
1 4893 0 0 315611 
2 10236 0 0 315611 
3 32760 0 0 315611 
4 0 0 0 0 
5 0 0 0 0 
6 0 0 0 315729 
7 0 1 0 315731 
8 0 0 0 0 
9 0 1 0 315739 
10 0 0 0 0 
11 0 1 0 315743 
12 0 0 0 315745 
13 0 1 0 315747 
14 0 1 0 315749


Next, we run ps command and check the PID:

[root@node2 ~]# ps -fp 315729
UID PID PPID C STIME TTY TIME CMD
oracle 315729 1 0 2018 ? 01:14:13 ora_pmon_SNEWDB
[root@node2 ~]#


As you see, we found out that the specific semaphore is associated with the database instance. Now let’s repeat the same steps for the semaphores of the root user:

[oracle@node2 ~]$ ipcs -s |grep root
0x61000625 98306 root 666 1
0x00000000 163844 root 666 3
0x00000000 1769477 root 666 3
0x00000000 4096006 root 666 3
0x00000000 248774666 root 666 3
0x00000000 286752781 root 666 3
0x00000000 6357007 root 666 3


Now we run ipcs -s -i command for the semaphore which is marked in bold to find the PID :

[oracle@node2 ~]$ ipcs -s -i 248774666
Semaphore Array semid=248774666
uid=0 gid=11140 cuid=0 cgid=11140
mode=0666, access_perms=0666
nsems = 3
otime = Sun Dec 16 18:34:22 2018
ctime = Sun Dec 16 18:34:22 2018
semnum value ncount zcount pid
0 1024 0 0 156155
1 32000 0 0 156155
2 0 0 0 156155


If we check the PID in the system, we see that it’s not available:

[oracle@node2 ~]$ ps -fp 156155
UID PID PPID C STIME TTY TIME CMD
[oracle@node2 ~]$


Now we can safely remove that semaphore from the memory using ipcrm command in order to release space for new semaphores:

[root@node2 ~]# ipcrm -s 248774666
[root@node2 ~]#
Let's check if it was removed:
[root@node2 ~]# ipcrm -s 248774666
ipcrm: invalid id (248774666)
[root@node2 ~]#


As you see, we found out the semaphores which associated process is not available in the system, and removed it to make space for new semaphores. Now let’s start the instance:

SYS@TEST> startup nomount
ORACLE instance started.
Total System Global Area 2137886720 bytes
Fixed Size 2254952 bytes
Variable Size 956303256 bytes
Database Buffers 1090519040 bytes
Redo Buffers 88809472 bytes
SYS@TEST>


Posted in Administration | No Comments »

Connect to Oracle from Python – write your first Python script!

Posted by Kamran Agayev A. on 3rd June 2019

Python is getting more popular nowadays, because it is reliable and efficient, it has great corporate sponsors, and because of it’s amazing libraries that helps you to save time during the initial development cycle.

It’s much more easy to connect to an Oracle Database from Python by using cx_Oracle module. To get more information about cx_Oracle module, check the following links:

https://oracle.github.io/python-cx_Oracle/ 

https://cx-oracle.readthedocs.io/en/latest/installation.html


In this blog post, I will show how to install Python and configure the environment and connect to the database.

First of all, make sure you’ve an internet connection and install Python with yum as follows:

yum install python

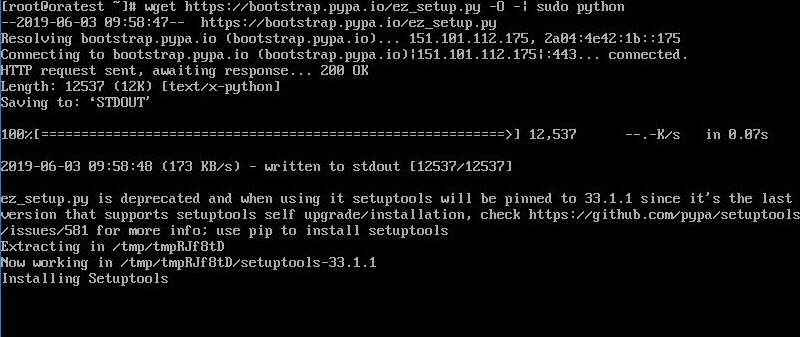
After python is installed, install easy_install on Linux in order to download and manage Python packages easily using the following command:

wget http://bootstrap.pypa.io/ez_setup.py -O -| sudo python

easy_install installation

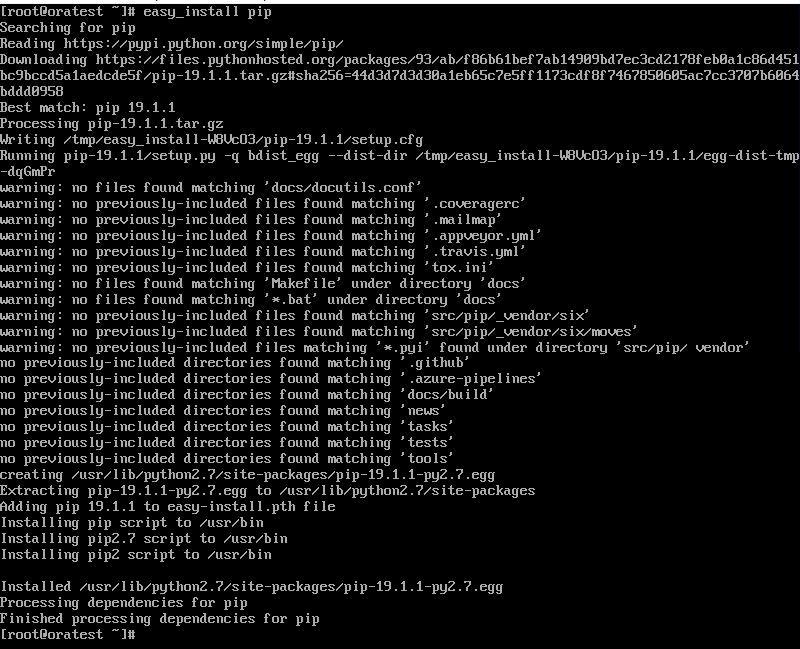
Next install pip using easy_install as follows:

pip_installation

Now install cx_Oracle module using pip as follows:

install_cx_Oracle_using_pip


Now install Oracle instant client:

cd /etc/yum.repos.d
wget https://yum.oracle.com/public-yum-ol7.repo
yum install -y yum-utils
yum-config-manager --enable ol7_oracle_instantclient
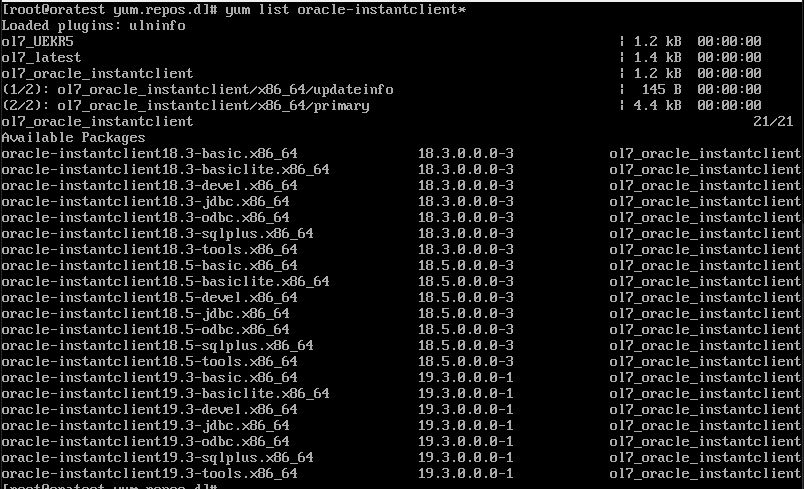
yum list oracle-instantclient*

yum_list_oracle_instantclient


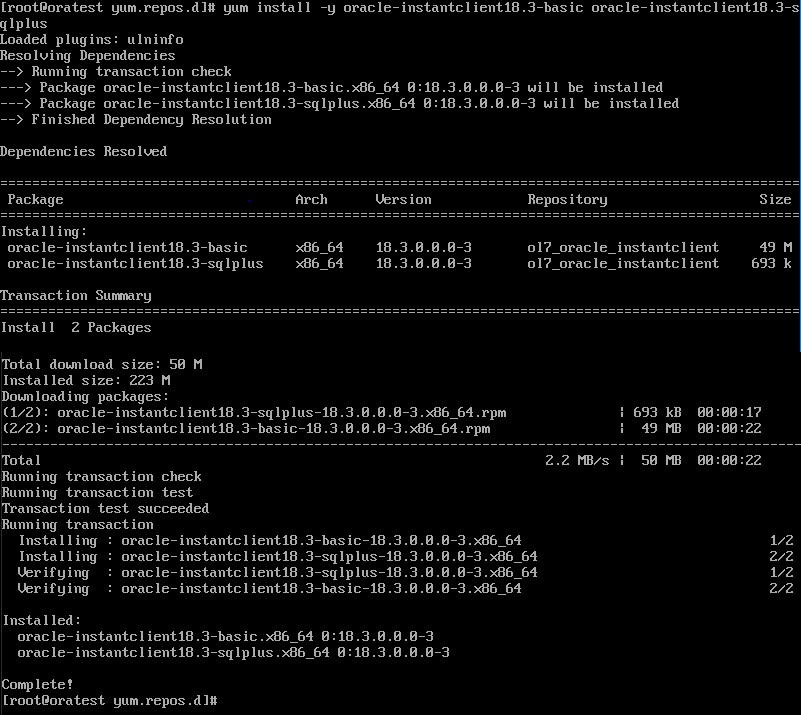
Now install Oracle instance client basic and sqlplus as follows:

yum_install_oracle_instantclient


After installing Oracle client, configure environment variables as follows:

vi .bashrc
export CLIENT_HOME=/usr/lib/oracle/18.3/client64
export LD_LIBRARY_PATH=$CLIENT_HOME/lib
export PATH=$PATH:$CLIENT_HOME/bin


run .basrhc file to set environment variables and write your first Python script as follows:

vi connect.py 
import cx_Oracle
con=cx_Oracle.connect('username/password@ip_address/service_name')
print con.version
con.close()


If we run this script, we will get Oracle Database version in the output:

[root@oratest ~]python connect.py
11.2.0.4.0
[root@oratest ~]


Now let’s use split function in Python and split the version into “Version, Release and Patchset” sections as follows:

import cx_Oracle
con=cx_Oracle.connect('username/password@ip_address/service_name')
ver=con.version.split(".")
print 'Version:', ver[0],'\nRelease:',ver[1],'\nPatchset:',ver[3]
con.close()

[root@oratest ~]python connect.py
Version: 11
Release: 2
Patchste: 4
[root@oratest ~]


Now let’s create a table in Oracle and write a simple python code to query and print all rows in the table:

SQL> create table test_table(id number, name varchar2(10));
Table created.
SQL> insert into test_table values(1,'Oracle DB');
1 row created.
SQL> insert into test_table values(2,'SQL');
1 row created.
SQL> insert into test_table values(3,'PL/SQL');
1 row created.
SQL>


Now create a python code to query the table:

import cx_Oracle
con=cx_Oracle.connect('username/password@ip_address/service_name')
cur=con.cursor()
cur.execute('select * from test_table order by 1')
for result in cur:
      print result
cur.close()
con.close()


[root@oratest ~]python connect.py
(1,'Oracle DB')
(2,'SQL')
(3,'PL/SQL')
[root@oratest ~]

Congratulations! You’ve installed/configured Python, connected to an Oracle database, queried the table and printed the output!

Posted in Administration | 3 Comments »

Download and install Oracle Database 18c – NOW!

Posted by Kamran Agayev A. on 25th July 2018

Most of you already have seen that Oracle Database 18c has been already released. If you haven’t downloaded and installed it yet, let’s do it!

First of all, check the following address and download the installation of Oracle Database 18c:

http://www.oracle.com/technetwork/database/enterprise-edition/downloads/oracle18c-linux-180000-5022980.html

If you want to download it from the host itself, you can use wget by providing username, password and the installation zip file as follows:

wget –http-user=YOUR_USERNAME –http-password=YOUR_PASSWORD –no-check-certificate –output-document=LINUX.X64_180000_db_home.zip “https://download.oracle.com/otn/linux/oracle18c/180000/LINUX.X64_180000_db_home.zip”

If you want to get more information on this technique, check the following metalink note:

Using WGET to download My Oracle Support Patches (Doc ID 980924.1)


Next, unzip the file and run ./runInstaller :

Capture1


Choose the first option and click Next:

Capture2


If you don’t want to choose the components and configure the advanced options, choose “Desktop class” and click Next:

Capture3


Provide the Oracle Base and database file locations, database name and the SYS password and click Next


Capture4


Check the summary information and click Install


Capture5


Installation (actually relinkin) will proceed and you will be asked to run the root.sh script with the root user. Run it and click Ok to proceed


Capture6


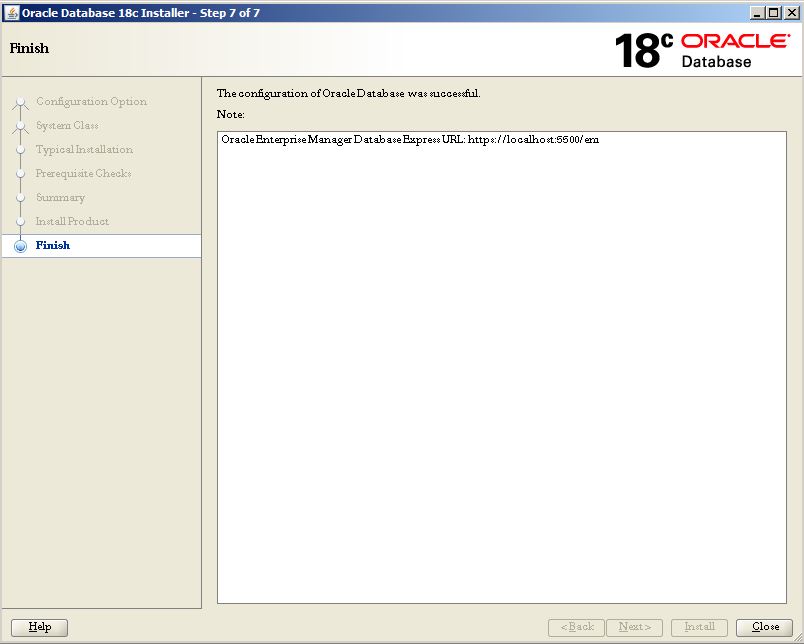
The installation will create a database, provide the OEM page and finishes.

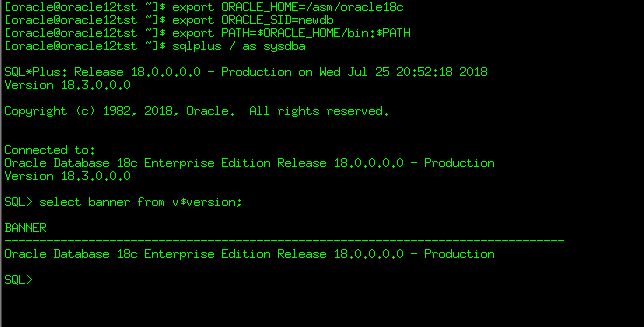
Click close, switch to the terminal, login to the database and start getting your hands dirty with Oracle 18c!

Capture7


In the next posts, I will share 18c new featuers with practical use cases. Good Luck!


Posted in Administration | 2 Comments »

The most horrific Oracle messages you might get in the production database – or – why DBAs get older

Posted by Kamran Agayev A. on 10th May 2018

If you are a production DBA of mission critical system, then you might have already seen the following critical, I would say mortal messages in your alert.log file.

  • When your database was up and running, you shutdown it and open and it fails to MOUNT the database and abort

image_1


  • The database was hanged with millions of online transactions, and aborted. You start the instance, switch to the MOUNT mode, do some maintenance tasks and try to open the database and …. wait …. wait …. wait …..

image_2


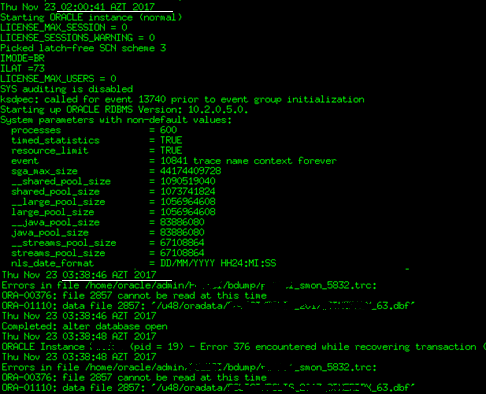
  • system01.dbf contains corrupted blocks


Image_3


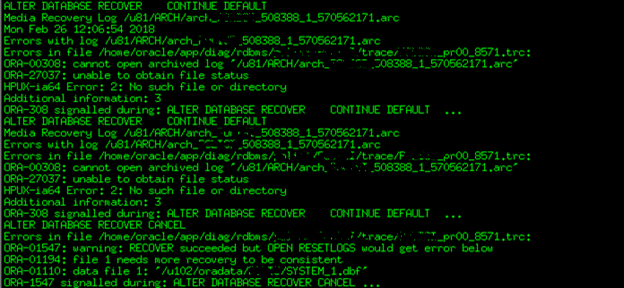
  • When it takes 15 hours to restore the database, you run the recover database command and get the following errors:

image_4


  • When you’ve done with restore/recover and open the database with RESETLOGS option and see the following errors:


Image_5


  • When you have missing datafiles of a tablespace with 10Tb size due to hard disk corruption and don’t have a backup

image_6


  • Incomplete recovery due to missing archived log files and most probably you are going to fail using *.allow_resetlogs_corruption parameter as well


Image_7


  • When your database hangs, you get a hard disk corruption and lose some datafiles, and it takes an hour and half to perform and instance recovery and you just wait for that time of period for the database to be opened:


Image_8


  • Aaaand most annoying message during the recovery


Image_9


I will keep updating this post with your and my screenshots. Feel free to send me screenshot of cases where you stressed, but eventually succeeded to solve the database issue

Posted in Administration | 2 Comments »

Step by Step Mastering Oracle Database Cloud Service – DBaaS – in one pdf now!

Posted by Kamran Agayev A. on 16th February 2017

Hello guys

After posting a few articles on DBaaS, I’ve decided to create a single pdf file and collect all my cloud related step by step practical blog posts in it. Click on the following image to download the pdf file and become Oracle DBaaS master! :) I will keep updating the pdf and hope it will be much easier fo you to get all articles in one shot!


Oracle DBaaS

Posted in Administration, Oracle Cloud | 20 Comments »

RMAN “Catalog start with” returns “no files found to be unknown to the database”

Posted by Kamran Agayev A. on 2nd January 2016

Interesting issue happened today (running 11.2.0.3 DB on Linux) while using “CATALOG START WITH” command in RMAN. Although I was having all backups under /orabackup folder, RMAN didn’t find anything, reporting “no files found to be unknown to the database” message:

RMAN> catalog start with ‘/orabackup’;

searching for all files that match the pattern /orabackup
no files found to be unknown to the database

RMAN>


I changed the permission to “chmod 777” and checked the owner, used different patterns like “/orabackup/*”, “/orabackup/” and  “/orabackup/*.bkp” but failed. Then I decided to create a folder under the /orabackup folder, moved all files in it and tried “CATALOG START WITH” command again, and succeeded.

RMAN> catalog start with ‘/orabackup’;

searching for all files that match the pattern /orabackup
no files found to be unknown to the database

RMAN>

[oracle@db1 ~]$ cd /orabackup/
[oracle@db1 orabackup]$ mkdir test
[oracle@db1 orabackup]$ mv *.bkp test/
RMAN> catalog start with ‘/orabackup/test’;

searching for all files that match the pattern /orabackup/test

List of Files Unknown to the Database
=====================================
File Name: /orabackup/test/mydb_database_btqqatr2_1_1.bkp
File Name: /orabackup/test/mydb_database_bsqqakoq_1_1.bkp
File Name: /orabackup/test/mydb_arch_buqqatrp_1_1.bkp
File Name: /orabackup/test/mydb_contolfile_bvqqatsc_1_1.bkp
File Name: /orabackup/test/mydb_spfile_c0qqatsk_1_1.bkp

Do you really want to catalog the above files (enter YES or NO)? YES
cataloging files…
cataloging done

List of Cataloged Files
=======================
File Name: /orabackup/test/mydb_database_btqqatr2_1_1.bkp
File Name: /orabackup/test/mydb_database_bsqqakoq_1_1.bkp
File Name: /orabackup/test/mydb_arch_buqqatrp_1_1.bkp
File Name: /orabackup/test/mydb_contolfile_bvqqatsc_1_1.bkp
File Name: /orabackup/test/mydb_spfile_c0qqatsk_1_1.bkp

RMAN>


Posted in Administration, RMAN Backup and Recovery | 11 Comments »

Interim patch apply best practices in Oracle

Posted by Kamran Agayev A. on 2nd October 2015

Yestarday, after successfully applying an interim patch to the 3 node clusterware environment, I decided to share my experience with you. In this blog post, you can find some best practicec that I think must be followed before and during patch insallation to bring the downtime and failure risks to the minimum.

First of all, make sure you read the following metalink notes:

Master Note For OPatch (Doc ID 293369.1)
FAQ: OPatch/Patch Questions/Issues for Oracle Clusterware (Grid Infrastructure or CRS) and RAC Environments (Doc ID 1339140.1) 


Before applying any interim patches or upgrading the database or the clusterware, make sure you have answers to the following questions:

– Have you tested the patch installation? 

– Have you tested rollback of the patch? 

– What you will do if you can’t rollback the patch with default rollback mechanism? 

– What you will do if you fail to open the database after the patch installation? 

Do you have a backup? Have you tested it? What if you don’t have enough time to restore? 


Here is the list of what I would prefer to do before applying any interim patches to the mission critical environment:

– Backup the home folder that is going to be patched

tar -cvf grid_home_before_patch.tar /home/oracle/app/11.2.0

If the patch installation goes wrong and you can’t rollback the patch using default method, restore the backup of the installation home folder and bring the database (clusterware) up.

– Make sure you have a full backup of the database 

Most probably you will not go with the restoration, but you never know what might happen)

– Make sure your backup is recoverable

Yes. This might be a discussion topic, but I strongly believe (as an author of the RMAN Backup and Recovery book :) ) in “If you don’t test your backup, you don’t have a backup” philosophy. Restore it and make sure a) The backup is restorable/recoverable b) Your restore/recover scripts works fine. In my experience, I had a situation where the restore of the backup failed while restoring it for the developers for the testing purpose because of non tested recovery scripts. I heard a situation (a couple of years ago when I attended a wonderful OOW session) where one of the attendees complained how they failed to restore a backup when the production environment failed and this downtime (for days) costed them for a couple of million dollars.

– Make sure you have a Standby database.

Why? Imagine you took 30 minutes downtime to apply the patch and for any reason you were not able to do it and can’t rollback because you are in the middle of the patch apply procedure and trying to fix the issue. Or you can’t rollback the patch for any reason. You stuck! And you don’t have time to solve it. And you are forced to open the database right away. And you can’t do it as well. In this critical case, you can forward the applications to the Standby database. Build up a standby database, make sure archived log files of the production database are shipping to the standby server. You can also perform a failover to test your standby database and build it up again.

– Test the patch apply procedure on the test environment with the “same binaries”. 

Clone the database and clusterware soft to the test machine (or install the same release and apply the same patches as in the production environment) and apply the patch. Get the errors in the test environment before you get them in the production.

– Make sure there’s no any session runinng in the background related with the binaries of the home that is being patched. 

Yesterday, when I was trying to apply an interim patch to the 3 node clusterware (11.2.4) I came up with the following error:

Backing up files…

UtilSession failed: Map failed
java.lang.OutOfMemoryError: Map failed
Log file location: /home/oracle/11.2.0/grid_1124/cfgtoollogs/opatch/opatch2015-10-01_17-40-56PM_1.log

OPatch failed with error code 73

The reason was not the memory at all, we were having a lot of free memory at that time. There were some binary files in use in the background despite the fact that the whole clusterware stack was down. Anyway, I killed all processes and the installation proceeded.

The following metalink note also might be useful – OPatch Apply/Rollback Errors: ‘Prerequisite check “CheckActiveFilesAndExecutables” failed’ (Doc ID 747049.1)

– Download the latest OPatch

Check the following metalink note to download the latest OPatch. How To Download And Install The Latest OPatch Version (Doc ID 274526.1)

Download and extract it under the home folder that is going to be patched. Add the $GRID_HOME/OPatch or $ORACLE_HOME/OPatch to the PATH environment variable. Make sure which opatch command returns you a result

– Make sure you have enough free space in the mount point where the home folder reside.

A few years ago when I was trying to install a patch to the production environment, I decided to try it on the test environment (10 minutes before patching a production database). I ended up with the “There is no free space to proceed the installation” error. Home folder was full, and OPatch was taking backup of the binaries and library files that are being patched.  Check the following metalink note for more informaton: Opatch Fails Updating Archives with ” No space left on device ” Error. (Doc ID 1629444.1)

 – Bring the instance down before patching

If you have a Grid Infrastructure installed, you have a RAC database and you plan to apply the patch node by node without a downtime, bring the instance of the node you’re patching using the following command:

srvctl stop instance -d RACDB -i RACDB1

Why? Because if you start installing the patch and run the rootcrs.pl -unlock command which is the first step that brings the clusterware stack down, the database will be closed with ABORT mode and non of the sessions will be failed over.

– Try to rollback the patch installation at test environment after installing it

Why? Feel how you should rollback (and see if you get any error) the specific patch if you failed the installation and can’t proceed, or you installed successfully, but it caused another bug or problem. Check the following metalink note to learn how to rollback the patch and run opatch lsinventory to make sure it is rollbacked.  How to Rollback a Failed Interim Patch Installation (Doc ID 312767.1)

Sometimes, rollback also might fail :) In this case, the best option is to restore the whole home folder from the backup, but it is not mentioned in ths metalink note OPatch Fails to Rollback Patch Due to Relink Errors (Doc ID 1534583.1)

– Debug the OPatch if it is stuck 

You can use OPATCH_DEBUG=TRUE parameter to debug the OPatch. If it doesn’t generate enough information, use truss (or strace in Liunx) to debug OPatch. Check the following metalink note to learn how to use truss with OPatch. How To Use Truss With OPatch? (Doc ID 470225.1) 

Opatch might also hang due to corrupted jar and java executables. Check this metalink note – opatch napply Hanging (Doc ID 1055397.1)


This is all I have :) Please let me know if this document helped you and share your experience with me :) Have a successfull patching days ahead! :)

Posted in Administration, RAC issues | 8 Comments »

ORA-02298: cannot enable name – parent keys not found

Posted by Kamran Agayev A. on 28th August 2015

An interesting case we just got while migrating a data to the different database where we got the following error:


ORA-39083: Object type REF_CONSTRAINT failed to create with error:

ORA-02298: cannot enable name – parent keys not found


The issue was between 2 tables. It couldn’t enable the foreign key constraint by throwing error that “parent key not found”. The migration was from production database where the foreign key constraint was enabled and it is not possible to have a data in the child table without parent rows.

After quering both tables I found the missing rows, deleted them from the child table and run the query to enable the constraint again – and it succeeded. The reason was because the first table that was exported was the primary table. Then a few rows were added to both primary and child tables (in the production database). Then child table was exported with having those rows which are missing from the primary table (because it was exported firstly)

The solution was to use FLASHBACK_SCN or FLASHBACK_TIME parameter while exporing the data and get all rows that are consistent as of this SCN or TIME

Posted in Administration | No Comments »

ORA-00304: requested INSTANCE_NUMBER is busy

Posted by Kamran Agayev A. on 27th August 2015

There are a lot of explanation and different solutions for the error “ORA-00304: requested INSTANCE_NUMBER is busy”. But today, in my case while I was tyring to shutdown one of the cluster nodes, it hanged. There were no more information related with the hang in the log and trace files, so I went with shut abort and startup and got the following message:

SQL> startup

ORA-00304: requested INSTANCE_NUMBER is busy

SQL>

The second node of the RAC database was up and running. And the instance_number was set to 2. After a little investigation, I found out that there was one process related with the database running on OS (even the database was closed) I killed that session and started the first node and it opened successfully

Posted in Administration, RAC issues | 3 Comments »

Getting ORA-01105 during RAC db startup

Posted by Kamran Agayev A. on 30th July 2014

Today, while starting RAC instances of 2 node RAC database (10gR2 on Linux), I got the following error in the first node:

ORA-01105: mount is incompatible with mounts by other instances
ORA-01677: standby file name convert parameters differ from other instance


I checked the alert.log file, but there was no enough information to solve this issue:

Wed Jul 30 09:58:48 AZST 2014
Setting recovery target incarnation to 2
ORA-1105 signalled during: ALTER DATABASE MOUNT…
Wed Jul 30 09:58:58 AZST 2014
SUCCESS: diskgroup DATA was dismounted


After playing with some initialization parameters, I found a metalink note where it was defined as a bug (bug13001004)

Check out the following metalink note:

Spfile defined in OCR is not used if one exists in $ORACLE_HOME/dbs (Doc ID 1373622.1)


The solution is – to move parameter file to the centralized directory (/ocfs) and remove any instance_name parameter

Posted in Administration, RAC issues | No Comments »