Migrating Oracle 10g Grid Control to the new server
Posted by Kamran Agayev A. on June 24th, 2011
In this step by step guide I’ll show you how to move the Grid Control from one machine to another. For this I’ll use three virtual machines:
TestDb01 – Is the machine where I’ve installed the Grid Control and there’re three databases that are deployed
TestDB02 – Is the machine where I’ll install new Grid Control
TestDB03 – Is the machine for the databases that are deployed to the first Grid Control
So here is my plan of the whole scenario:
– I’ve installed Grid Control on the Testdb01 server (Repository db name is emrep)
– I’ve installed Grid Control on the Testdb02 server (this Grid control will replace the previous one and the repository db name is repnew)
To install Grid Control, use my previous blog posts:
- Video Tutorial – Installing Oracle 10gR2 Grid Control and deploying agent on Linux and Windows OS
- Solving the error “OUI-25031″ during Oracle 10g R2 Grid Control (10.2.0.3) installation
– Then, I’ll create two databases on the third server (Testdb03) and deploy the agent to the first Grid Control
After all above pre-requisite steps are ready, we can start the migration. Here’re the migration steps:
– Stop all application server components
– Perform some pre-requisite steps on the Grid Control host
– Run DBCA and create a template of the Grid Control Repository database
– Connect to the target Grid host and restore the database using DBCA
– Change emoms.properties file
– Start application server components
– Change emd.properties file of each agent
– Start using the new Grid Control on the new host
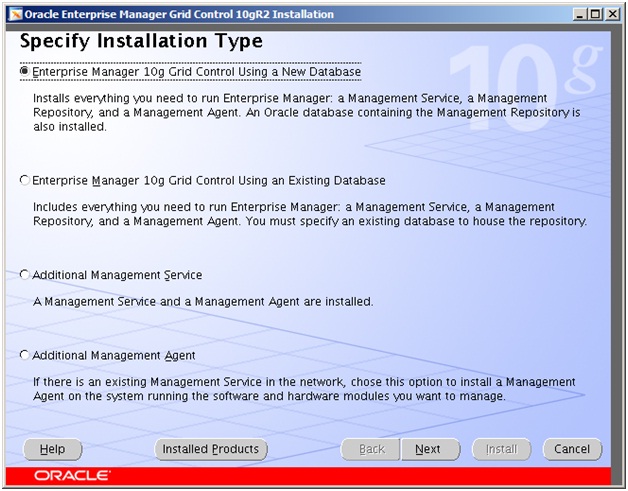
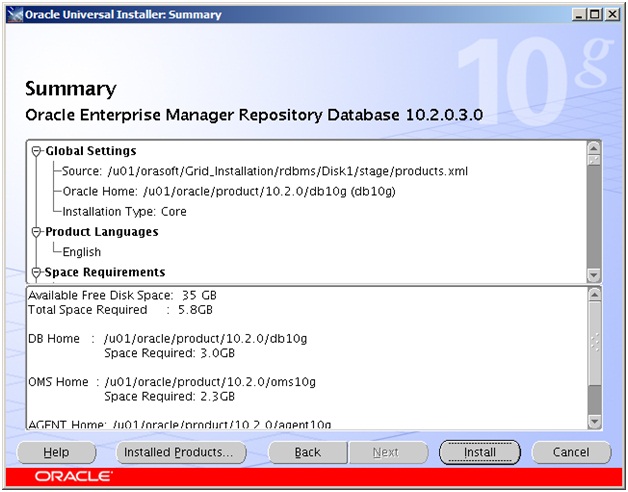
Now let’s start installing the first Grid Control. Download and unzip the installation and run the installer:
Check the first option and click Next:
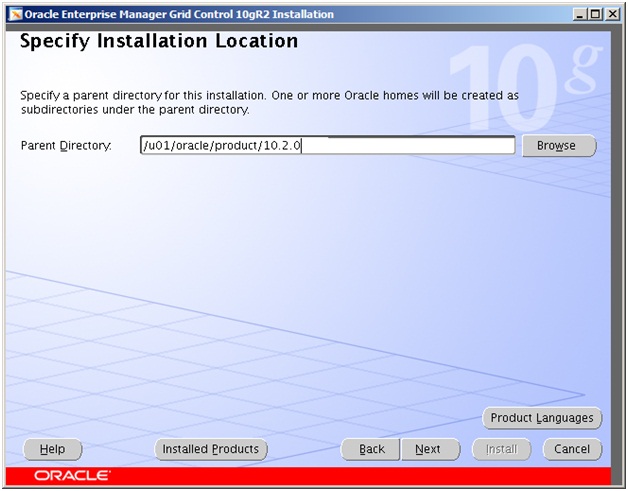
Provide the home directory and click next
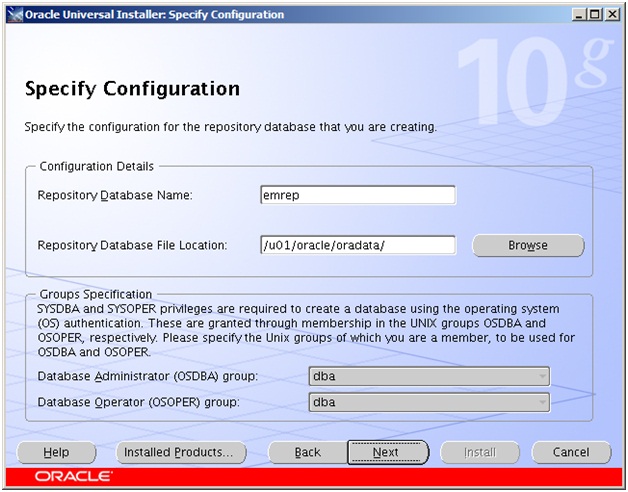
Provide the repository database name and click next. The next steps are simple so I didn’t provide their screenshot, just click Finish to start the installation:
After installation completes, you’ll get an error during the configuration. Try the second link I’ve provided to solve the problem, it’s a bug
Now switch to the second machine (testdb02) and install the new Grid Control and provide the repository name as ‘emrep2’
After installing both Grid Controls, make changes to the “hosts” file which resides under “C:\Windows\System32\drivers\etc” folder of your local PC and add host name and ip address information in order to be able to login both Grid Controls from local web browser.
[code]192.168.0.1 testdb01
192.168.0.2 testdb02[/code]
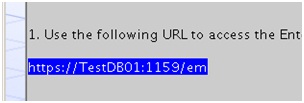
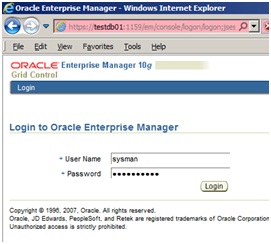
Now open the browser and switch to the link that’s provided at the end of the installation:
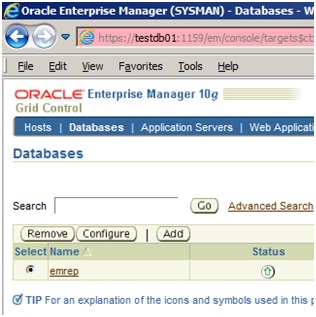
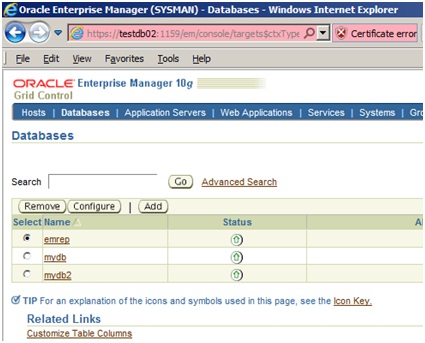
Switch to the Targets menu and select Databases link:
You’ll see that the Repository database “emrep” is registered automatically and the status is UP
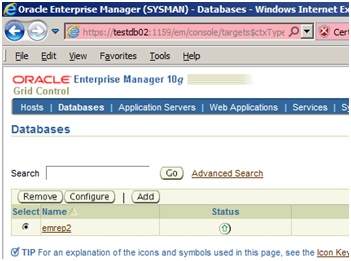
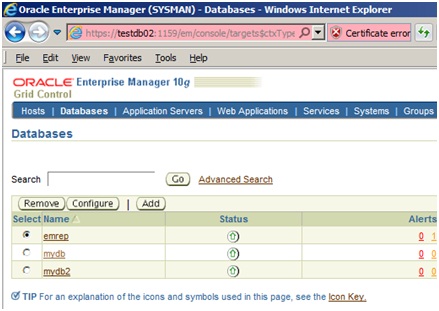
Switch to the second Grid Control, make login and check the status of the databases :
Ok. Now let’s create two databases in the third machine and deploy them to the first Grid Control.
Let’s create the first database. Switch to the third machine and run dbca. Make sure you’ve added the Grid Control ip and host name information to the /etc/hosts file:
[code]192.168.0.1 testdb01[/code]
Run DBCA, provide the name of the database (mydb). In the fourth step, you’ll not be able to deploy the agent, as you haven’t installed the agent yet. See, “Use Grid Control with Enterprise Manager” is not active:
Go on and finish the installation.
Now, let’s install the agent and deploy it to the first Grid Control. For this, in the first Grid Control machine, switch to the following directory and copy the installation file to the third machine:
[code][oracle@TestDB01~]$ cd /u01/oracle/product/10.2.0/oms10g/sysman/agent_download/10.2.0.3.0/linux_x64
[oracle@TestDB01 linux_x64]$ scp agentDownload.linux_x64 testdb03:/tmp/
oracle@testdb03’s password:
agentDownload.linux_x64 100% 27KB 26.9KB/s 00:00 [/code]
Now switch to the third machine and run the installation as follows:
[code][oracle@TestDB03 ~]$ chmod 755 /tmp/agentDownload.linux_x64
[oracle@TestDB03 ~]$ /tmp/agentDownload.linux_x64 -b /u01/oracle/product/10.2.0 -m "testdb01" [/code]
This command will extract the installation remotely and installs the agent to the specified directory
After installation completes, run the following root.sh script with the root user:
/u01/oracle/product/10.2.0/agent10g/root.sh
Now agent is installed. Let’s secure it and check the status:
[code][oracle@TestDB03 bin]$ ./emctl status agent
Oracle Enterprise Manager 10g Release 3 Grid Control 10.2.0.3.0.
Copyright (c) 1996, 2007 Oracle Corporation. All rights reserved.
—————————————————————
Agent Version : 10.2.0.3.0
OMS Version : 10.2.0.3.0
Protocol Version : 10.2.0.2.0
Agent Home : /u01/oracle/product/10.2.0/agent10g
Agent binaries : /u01/oracle/product/10.2.0/agent10g
Agent Process ID : 7739
Parent Process ID : 7713
Agent URL : http://TestDB03:1830/emd/main/
Repository URL : http://testdb01:4889/em/upload/
Started at : 2011-06-23 14:07:21
Started by user : oracle
Last Reload : 2011-06-23 14:07:21
Last successful upload : (none)
Last attempted upload : (none)
Total Megabytes of XML files uploaded so far : 0.00
Number of XML files pending upload : 13
Size of XML files pending upload(MB) : 4.87
Available disk space on upload filesystem : 81.63%
Last attempted heartbeat to OMS : 2011-06-23 14:08:23
Last successful heartbeat to OMS : unknown
—————————————————————
Agent is Running and Ready[/code]
[code][oracle@TestDB03 bin]$ ./emctl clearstate agent
Oracle Enterprise Manager 10g Release 3 Grid Control 10.2.0.3.0.
Copyright (c) 1996, 2007 Oracle Corporation. All rights reserved.
EMD clearstate completed successfully[/code]
[code][oracle@TestDB03 bin]$ ./emctl secure agent
Oracle Enterprise Manager 10g Release 3 Grid Control 10.2.0.3.0.
Copyright (c) 1996, 2007 Oracle Corporation. All rights reserved.
Enter Agent Registration password :
Agent successfully stopped… Done.
Securing agent… Started.
Requesting an HTTPS Upload URL from the OMS… Done.
Requesting an Oracle Wallet and Agent Key from the OMS… Done.
Check if HTTPS Upload URL is accessible from the agent… Done.
Configuring Agent for HTTPS in CENTRAL_AGENT mode… Done.
EMD_URL set in /u01/oracle/product/10.2.0/agent10g/sysman/config/emd.properties
Securing agent… Successful.
Agent successfully restarted… Done.
[oracle@TestDB03 bin]$[/code]
[code]
[oracle@TestDB03 bin]$ ./emctl upload agent
Oracle Enterprise Manager 10g Release 3 Grid Control 10.2.0.3.0.
Copyright (c) 1996, 2007 Oracle Corporation. All rights reserved.
—————————————————————
EMD upload completed successfully
[oracle@TestDB03 bin]$ ./emctl status agent
Oracle Enterprise Manager 10g Release 3 Grid Control 10.2.0.3.0.
Copyright (c) 1996, 2007 Oracle Corporation. All rights reserved.
—————————————————————
Agent Version : 10.2.0.3.0
OMS Version : 10.2.0.3.0
Protocol Version : 10.2.0.2.0
Agent Home : /u01/oracle/product/10.2.0/agent10g
Agent binaries : /u01/oracle/product/10.2.0/agent10g
Agent Process ID : 9580
Parent Process ID : 9563
Agent URL : https://TestDB03:1830/emd/main/
Repository URL : https://TestDB01:1159/em/upload
Started at : 2011-06-23 14:09:48
Started by user : oracle
Last Reload : 2011-06-23 14:09:48
Last successful upload : 2011-06-23 14:10:16
Total Megabytes of XML files uploaded so far : 10.62
Number of XML files pending upload : 3
Size of XML files pending upload(MB) : 0.00
Available disk space on upload filesystem : 81.65%
Last successful heartbeat to OMS : 2011-06-23 14:09:50
—————————————————————
Agent is Running and Ready
[oracle@TestDB03 bin]$
[/code]
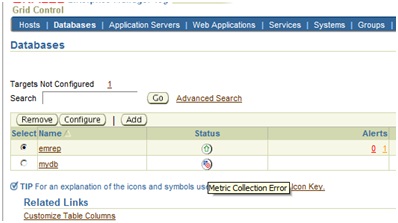
Now switch to the first Grid Control and check the Databases page again. If you didn’t get anything added, just logout and login again. You should get the following screen:
We have a metric collection for the second db, let’s configure it. Provide the password for the dbsnmp user and click OK. After a while it should be UP.
Now let’s create the second db and deploy it as well. But know, as we’ve installed agent, we should get the Grid Control deployment option during the database creation. Run dbca, provide the name of the database (mydb2)
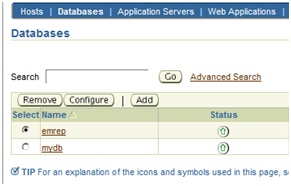
After installation completes, you’ll see the database was added to the Grid Control
Ok. Now let’s review what we have done so far, and what we need to do. There’re three databases that are deployed to the first Grid Control. Our mission is to move the first Grid Control to the second server and forward the connections from all agents (from testdb03 machine) to the new Grid Control (to testdb02)
Moving Grid Control to the new Host
First of all, stop all application server components, connect to the database and change the value JOB_QUEUE_PROCESSES parameter:
[code][oracle@TestDB01 bin]$ ./opmnctl stopall
opmnctl: stopping opmn and all managed processes…
[oracle@TestDB01 bin]$ export ORACLE_SID=emrep
[oracle@TestDB01 bin]$ sqlplus / as sysdba
SQL*Plus: Release 10.1.0.4.0 – Production on Thu Jun 23 15:29:00 2011
Copyright (c) 1982, 2005, Oracle. All rights reserved.
Connected to:
Oracle Database 10g Enterprise Edition Release 10.1.0.4.0 – 64bit Production
With the Partitioning, OLAP and Data Mining options
SQL> show parameter job_queue_processes
NAME TYPE VALUE
———————————— ———– ——————————
job_queue_processes integer 10
SQL> alter system set job_queue_processes=0;
System altered.
SQL> [/code]Then connect with SYSMAN and run the following command:
[code]SQL> conn sysman
Enter password:
Connected.
SQL> exec emd_maintenance.partition_maintenance;
[/code]Due to unknown bug, the procedure locks itself, so open new connection and check it’s wait event:
[code]SQL> col event format a30
SQL> col username format a30
SQL> set linesize 150
SQL> select username, sid, serial#, blocking_session, event from v$session where
username=’SYSMAN’;
USERNAME SID SERIAL# BLOCKING_SESSION EVENT
—————————— ———- ———- —————- ——————————
SYSMAN 129 1123 db file sequential read
After some minutes, you’ll get the following output
[code]USERNAME SID SERIAL# BLOCKING_SESSION EVENT
—————————— ———- ———- —————- ——————————
SYSMAN 129 1123 129 library cache pin [/code]What I did is to kill the first session and run the command again
[code]SQL> alter system kill session ‘129,1123’ immediate;
System altered.
SQL>[/code]
You’ll get the following output from the first session:
[code]BEGIN
emd_maintenance.partition_maintenance; END;
*
ERROR at line 1:
ORA-00028: your session has been killed
SQL> [/code]
Run the command again, and it will end with success
[code]SQL> exec emd_maintenance.partition_maintenance;
PL/SQL procedure successfully completed.
SQL>[/code]
Now run the following command:
[code]SQL> exec emd_maintenance.remove_em_dbms_jobs;
PL/SQL procedure successfully completed.
SQL>[/code]
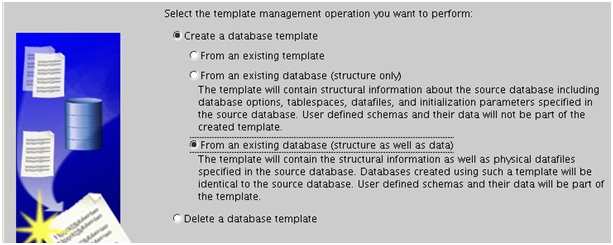
Now run DBCA from the Grid host and create a template. Select “Manage Template” and choose “From the existing database (structure as well as data)” option as follows:
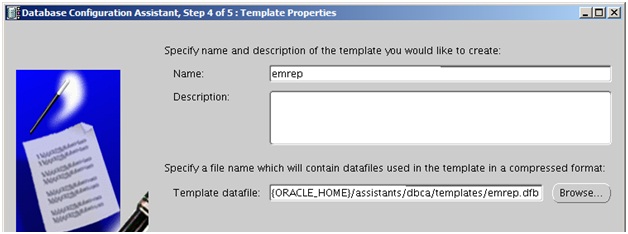
Provide the name for the template and click Next to create it in the directory shown below:
Now copy the file to the second grid control
[code][oracle@TestDB01 ~]$ scp /u01/oracle/product/10.2.0/db10g/assistants/dbca/templates/emrep.*
testdb02:/u01/oracle/product/10.2.0/db10g/assistants/dbca/templates/
emrep.dbc 100% 5975 5.8KB/s 00:00
emrep.dfb 100% 170MB 24.4MB/s 00:07
[oracle@TestDB01 ~]$[/code]
Now connect to the second Grid machine and restore the database using DBCA. Run dbca, choose Create database option and there you’ll see “emrep” template. Choose it and proceed:
Provide the name of the database as emrepnew and uncheck the option “Configure the database with Enterprise Manager”. Provide the same password as it was for the first Grid Control installation (it can be different as well) and finish the installation
After the installation connect to the new database and unlock the following accounts by providing the password:
[code][oracle@TestDB02 ~]$ export ORACLE_SID=emrepnew
[oracle@TestDB02 ~]$ sqlplus / as sysdba
SQL> alter user sysman identified by pass account unlock;
User altered.
SQL>alter user dbsnmp identified by pass account unlock;
User altered.
SQL>alter user mgmt_view account unlock;
User altered.
SQL>
Then run the following commands with SYSMAN user:
SQL> conn sysman
Enter password:
Connected.
SQL> exec emd_maintenance.analyze_emd_schema(‘SYSMAN’);
PL/SQL procedure successfully completed.
SQL> alter system set job_queue_processes=10 scope=both;
System altered.
SQL> exec emd_maintenance.submit_em_dbms_jobs;
PL/SQL procedure successfully completed.
SQL>[/code]
Now, we need to change emoms.propertiesfile to forward the Grid Control to the new repository. For this, firstly take backup of the emoms.properties file
[code][oracle@TestDB02 ~]$ cd /u01/oracle/product/10.2.0/oms10g/sysman/config/
[oracle@TestDB02 config]$ cp emoms.properties emoms.properties_backup [/code]
Then, edit that file and change the value of the following parameters:
oracle.sysman.eml.mntr.emdRepSID=emrep2
oracle.sysman.eml.mntr.emdRepConnectDescriptor=(DESCRIPTION\=(ADDRESS_LIST\=(ADDRESS\=(PROTOCOL\=TCP)(HOST\=TestDB02)(PORT\=1521)))(CONNECT_DATA\=(SERVICE_NAME\=emrep2)))
Change emrep2 to emrepnew, save and exit
Now stop and start the OMS
[code][oracle@TestDB02 bin]$ ./opmnctl stopall
opmnctl: stopping opmn and all managed processes…
[oracle@TestDB02 bin]$ ./opmnctl startall
opmnctl: starting opmn and all managed processes…[/code]
Now open the browser and view the new OEM
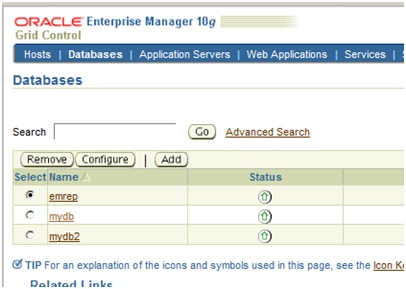
As you see, all databases are moved to the new grid control, I mean, OEM uses new repository. Now we need to change agent configurations as well to upload their data to the new OEM. Switch to the third machine (testdb03), move to the agent configuration directory, take backup of the emd.properties file and make the following changes:
[code][oracle@TestDB03 ~]$ cd /u01/oracle/product/10.2.0/agent10g/sysman/config/
[oracle@TestDB03 config]$ cp emd.properties emd.properties_backup[/code]Change the following parameters:
– REPOSITORY_URL
– emdWalletSrcUrl
– EMD_URL
REPOSITORY_URL=https://TestDB02:1159/em/upload
emdWalletSrcUrl=http://testdb02:4889/em/wallets/emd
EMD_URL=http://TestDB03:1830/emd/main/ (remove “s” from https)
Then, remove the following files:
[code]rm -r <AGENT_HOME>/sysman/emd/state/*
rm -r <AGENT_HOME>/sysman/emd/upload/*
rm <AGENT_HOME>/sysman/emd/lastupld.xml
rm <AGENT_HOME>/sysman/emd/agntstmp.txt
rm <AGENT_HOME>/sysman/emd/blackouts.xml
rm <AGENT_HOME>/sysman/emd/protocol.ini[/code]
Now switch to OMS and secure it again:
[code][oracle@TestDB02 bin]$ ./opmnctl stopall
opmnctl: stopping opmn and all managed processes…[/code]
[code][oracle@TestDB02 bin]$ cd ../../bin/
[oracle@TestDB02 bin]$ ./emctl secure oms
Oracle Enterprise Manager 10g Release 3 Grid Control
Copyright (c) 1996, 2007 Oracle Corporation. All rights reserved.
Enter Enterprise Manager Root Password :
Enter Agent Registration password :
OPMN processes already stopped… Done.
Securing central oms… Started.
Checking Repository… Done.
Checking Em Key… Done.
Checking Repository for an existing Enterprise Manager Root Key… Done.
Fetching Root Certificate from the Repository… Done.
Generating Registration Password Verifier in the Repository… Done.
Generating Oracle Wallet Password for Enterprise Manager OMS… Done.
Generating Oracle Wallet for Enterprise Manager OMS… Done.
Generating Oracle Wallet for iAS HTTP Server… Done.
Updating HTTPS port in emoms.properties file… Done.
Generating HTTPS Virtual Host for Enterprise Manager OMS… Done.
Securing central oms… Ended.
[oracle@TestDB02 bin]$ cd ../opmn/bin/
[oracle@TestDB02 bin]$ ./opmnctl startall
opmnctl: starting opmn and all managed processes…
[oracle@TestDB02 bin]$ [/code]Now switch to the agent host and secure it as well:
[code][oracle@TestDB03 bin]$ ./emctl secure agent
Oracle Enterprise Manager 10g Release 3 Grid Control 10.2.0.3.0.
Copyright (c) 1996, 2007 Oracle Corporation. All rights reserved.
Enter Agent Registration password :
Failed to stop agent…[/code]
If you got above error, kill the agent process manually and try again:
[code][oracle@TestDB03 bin]$ ps -ef | grep agent
oracle 1556 31812 0 13:59 ? 00:00:02 /u01/oracle/product/10.2.0/db_1/bin/emagent
[oracle@TestDB03 bin]$ kill -9 1556 [/code]
[code][oracle@TestDB03 bin]$ ./emctl secure agent
Oracle Enterprise Manager 10g Release 3 Grid Control 10.2.0.3.0.
Copyright (c) 1996, 2007 Oracle Corporation. All rights reserved.
Enter Agent Registration password :
Agent is already stopped… Done.
Securing agent… Started.
Requesting an HTTPS Upload URL from the OMS… Done.
Requesting an Oracle Wallet and Agent Key from the OMS… Done.
Check if HTTPS Upload URL is accessible from the agent… Done.
Configuring Agent for HTTPS in CENTRAL_AGENT mode… Done.
EMD_URL set in /u01/oracle/product/10.2.0/agent10g/sysman/config/emd.properties
Securing agent… Successful.
[oracle@TestDB03 bin]$[/code]
[code]
[oracle@TestDB03 bin]$ ./emctl start agent
Oracle Enterprise Manager 10g Release 3 Grid Control 10.2.0.3.0.
Copyright (c) 1996, 2007 Oracle Corporation. All rights reserved.
Starting agent …… started.
[oracle@TestDB03 bin]$ ./emctl upload agent
Oracle Enterprise Manager 10g Release 3 Grid Control 10.2.0.3.0.
Copyright (c) 1996, 2007 Oracle Corporation. All rights reserved.
—————————————————————
EMD upload completed successfully[/code]
[code][oracle@TestDB03 bin]$ ./emctl status agent
Oracle Enterprise Manager 10g Release 3 Grid Control 10.2.0.3.0.
Copyright (c) 1996, 2007 Oracle Corporation. All rights reserved.
—————————————————————
Agent Version : 10.2.0.3.0
OMS Version : 10.2.0.3.0
Protocol Version : 10.2.0.2.0
Agent Home : /u01/oracle/product/10.2.0/agent10g
Agent binaries : /u01/oracle/product/10.2.0/agent10g
Agent Process ID : 10098
Parent Process ID : 10081
Agent URL : https://TestDB03:1830/emd/main/
Repository URL : https://TestDB02:1159/em/upload
Started at : 2011-06-23 16:51:37
Started by user : oracle
Last Reload : 2011-06-23 16:51:37
Last successful upload : 2011-06-23 16:52:04
Total Megabytes of XML files uploaded so far : 6.78
Number of XML files pending upload : 1
Size of XML files pending upload(MB) : 0.00
Available disk space on upload filesystem : 81.75%
Last successful heartbeat to OMS : 2011-06-23 16:51:40
—————————————————————
Agent is Running and Ready
[oracle@TestDB03 bin]$[/code]
That’s all. We’ve successfully moved the Grid Control from one machine to another and made necessary changes to the Agent.
Here’re the list of metalink notes I’ve used which can be helpful for you to get more information
Grid Control Repository: Steps to Migrate the 10g Repository from One Machine to Another on the Same Platform [ID 1068841.1]
Grid Control Repository: How to Move Grid Control Repository from One Machine to Another Using DBCA (on the same Platform) [ID 733530.1]
How to Point an Agent to a Different Grid Control OMS and Repository? [ID 413228.1]
How to Secure the OMS and Agent Components in a 10g Grid Control Setup? [ID 283091.1]






June 24th, 2011 at 10:35 am
Very well presented! Excellent blog!
June 24th, 2011 at 12:29 pm
Thank you for the feedback Julian
June 25th, 2011 at 1:11 am
Your step by step guides are great.
Thanks for sharing 😉
Regards,
Marko
June 25th, 2011 at 1:48 am
Hi Marko, thanks for the feedback my friend
July 19th, 2011 at 10:39 pm
Could you not rsync from one machine to the other to get the new environment going?
July 22nd, 2011 at 5:15 pm
Dear Clive
Could you please elaborate more?
August 25th, 2011 at 7:13 pm
What I was alluding to was the possibility of being able to rsync the production 10G Grid environments to another server for testing purposes. This is to test upgrade to 11G Grid before production deployment.
April 13th, 2016 at 6:29 pm
We need to migrate 10g IAS. Can you provide detailed step by step document